Disclosure: Some of the links below are affiliate links. This means that, at zero cost to you, I will earn an affiliate commission if you click through the link and finalize a purchase. Learn more!
In this article, I'm going to explain to you step-by-step how to stream to YouTube Shorts utilizing Streamlabs.
Getting the Vertical Landscape
If you do not already have the Streamlabs desktop installed, you can click here to download it!
Once you have Streamlabs open, on the bottom left-hand side, you're going to want to make sure that you're logged in to YouTube.

When you press this button, it will prompt you to log in to your YouTube account if you are not already. Once you get logged in, you'll now need to set this up as a vertical landscape rather than a horizontal one to stream to YouTube Shorts.
To do this, go to settings (the gear icon) on the left-hand side, come to where it says 'Video', and for the 'Base' and 'Output', you'll want these to be opposite of what they are now. So rather than these being set to '1920 x 1080', we want these to be '1080 x 1920'. To input this, all you need to do is select 'Custom' and then type in '1080 x 1920'.

You can leave the rest of these settings as their default, so once you've changed your base and output resolution, simply press 'Done'.
We now have our vertical landscape so that we can stream to YouTube Shorts.
Setting Up Your Scenes
Next, you'll need to set up the scenes that you'll be utilizing while streaming.
To do this, select the plus sign icon under 'Scenes' and we'll name this 'Starting Soon'. Then, we'll select the plus sign icon again and name this one 'Gameplay'. Now that we have our scenes, we'll now need to add our overlays, camera, and gameplay.
For this tutorial, I'll be utilizing the overlays from Stream Designz. There are animated overlays that meet the needs and aesthetics of every streamer.

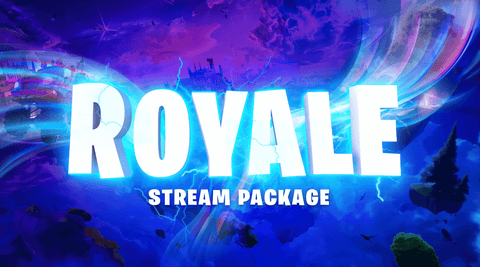
Today, I'll be using the 'Royale' overlay package, which is inspired by Fortnite, and which you can see below.
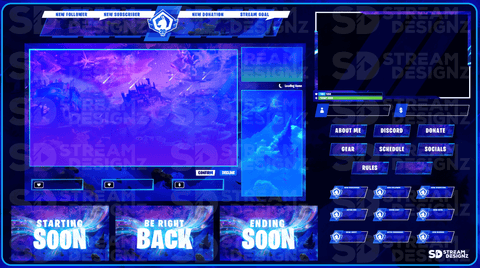
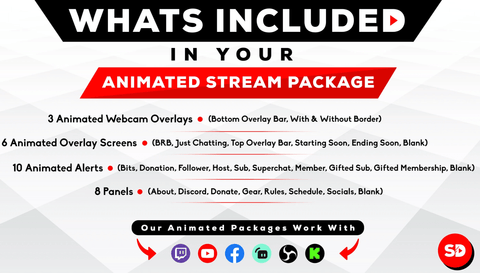
These packages are very easy to use, work with multiple different streaming platforms, and come with everything that you need to step up your stream and make it look much more professional. You can see everything that comes in the package below.
Once you've chosen a package, or once you have your overlays, head back over to Streamlabs.
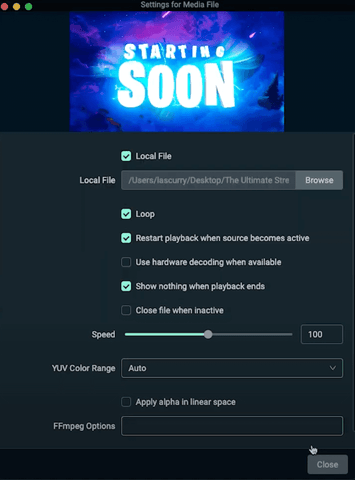
We'll start with the 'Starting Soon' scene. Press the plus sign icon under 'Sources', select 'Media File', press 'Add File', and let's name this "Start". You'll press 'Add Source' once more, and then you'll need to locate the file for your starting soon overlay.
If you purchased any overlay package off of Stream Designz, these are going to come in a zip file. Before you can use these on Streamlabs, you have to unzip them. If you're on a Mac, all you need to do is double-click the zip file and it will create a new folder with the files inside. If you're on a Windows, you'll right-click the zip file and select 'Extract'. This will then also move all of the files into a new folder that you can use for Streamlabs.
Once your files are able to be used, you'll go to the 'Overlay Screens' folder, select 'Starting Soon', and press 'Open'. Make sure to select 'Loop' and then press 'Close'.
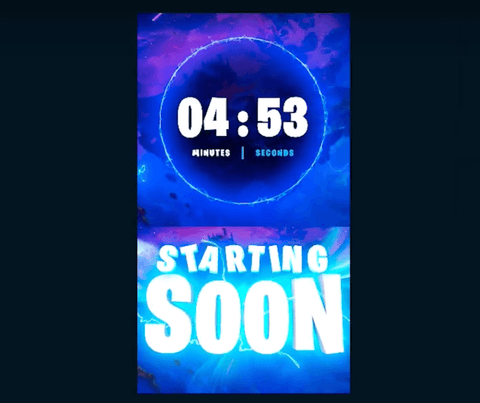
Now, we have to adjust this so that it fits nicely within the vertical landscape. I try to keep it to the point where it's big enough that it can still be seen, but not so big that it will be cut off.
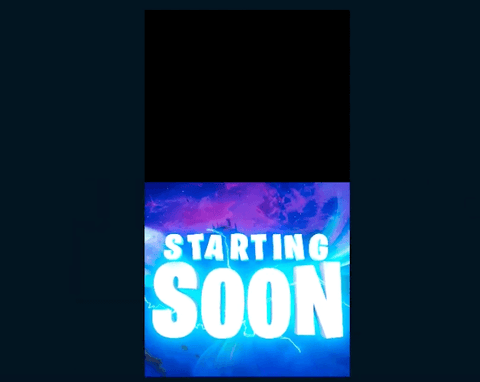
After adjusting this, your starting soon is ready to go.
Next, we need to add our 'Countdown Timer'.
If you purchased the overlay pack from Stream Designz, the countdown timer is not included and is sold separately. However, the great thing about using any of the Stream Designz packages is that there is a matching countdown timer for all of the designs.
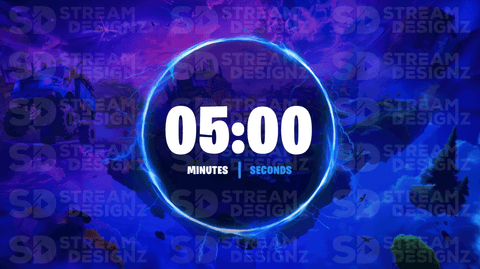
To add your countdown timer, select the plus sign icon under 'Sources', press 'Media File', then 'Add New Source', and we'll name this "Timer". Press 'Add New Source' again and then locate your countdown timer file.
For this one, you're not going to select 'Loop' as when the countdown timer ends, you'll be moving on to another scene. Now, you're going to want to center this exactly where you want it to be above your 'Starting Soon' screen.
With this done, we can now set up our gameplay scene.
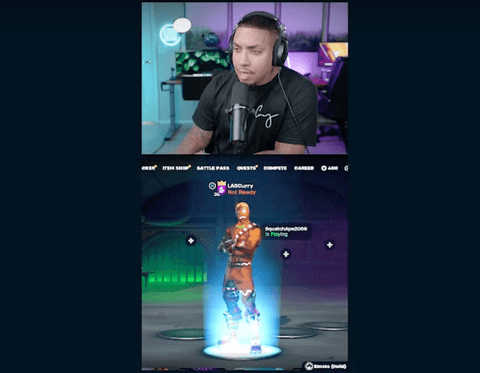
To do this, start by selecting your 'Gameplay' scene. Once this is selected, head over to sources and press the plus sign icon. This is where we're going to want to bring in our camera, so we need to select 'Video Capture Device' and we can name this 'Camera'. Press 'Add New Source' and now you'll be asked to select your device.
I want my camera to be at the highest quality possible, so I'll select that and then press 'Done'.
Once you do that, you'll need to adjust your camera to be exactly where you want it to be. I'm going to make my camera smaller because it's more important for the viewer to be able to clearly see the gameplay than it is for them to be able to see me.

Next, we need to add in the actual gameplay. To do this, press the plus sign icon. If you are gaming directly on your computer, you'll select 'Display Capture' or 'Window Capture' and then select the game that you want to appear. If you're streaming off of a console or if you will be utilizing a capture card, you're going to select 'Video Capture Device'. Then, you'll select 'Add Source' and you'll need to toggle on 'Add New Source Instead'. We'll name this 'Gaming', select 'Add Source', and then we'll select our capture card or whatever it is that you're streaming on.
I want this to have the best possible quality, so I'm going to set the 'Preset' to '1920x1080'. You'll press 'Done', and then you'll have to resize the gameplay below your camera.
You want this to have as much visibility as possible.
Now, we have both our starting soon and gameplay scene set up.
Adjusting Your Stream Settings
Next, we need to adjust our settings to make sure that our stream can have a high quality and that it doesn't lag.
To do this, press the gear icon on the bottom-left-hand side to go to 'Settings', and then go to where it says 'Stream'. You'll want to make sure that your stream destination is set to YouTube, and so long as you logged in at the beginning, it's going to be.
At the bottom, you'll see the option to 'Stream to Custom Ingest' which means that you can enter your own stream key if you want to. To get this stream key, you'll need to go to YouTube, select the 'Create' button in the top-right corner (the camera with the plus sign inside of it), and then press 'Go Live'.

If you've never gone live on YouTube before, it will make you wait 24 hours before you're able to access your stream key or to start livestreaming. If you have live streamed on YouTube before, it will bring you to a screen just like the one below.
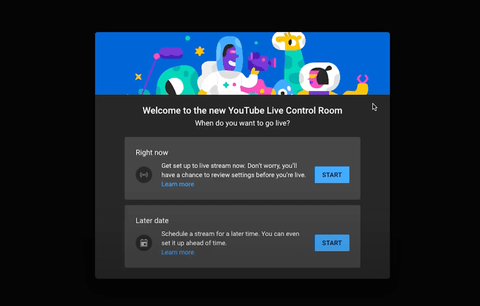
You'll press 'Start' under 'Right Now' and then on the left-hand side, you'll find your stream key. All you need to do now is copy and paste this into Streamlabs.
You can also just leave this set to 'Use Recommended Settings' which will connect you to YouTube without the stream key.
Now, on the left-hand side, go to 'Output'. This is where we can adjust the settings that will make our stream look good.
For 'Output Mode', you're going to want to set this to 'Advanced'.
For the 'Encoder', you're going to select NVIDIA if you're on a Windows, or you'll select 'Hardware Encoder' if you're on a Mac.
For 'Rate Control', if you do not see 'CBR', head back up to encoder, select 'Software (H264)', and then revert it back to 'Hardware Encoder' or 'NVIDIA', and then it should be an option.
'Bitrate' is by far the most important aspect in determining the quality of your stream. For YouTube, you'll want to have a bitrate between 6,000 to 9,000. Personally, I always use 9,000, but a quick way to see if you can use 9,000 is to go to Speedtest.net. If you have an upload speed of 20 or more, then you are perfectly fine to use 9,000 without any issues.
For 'Keyframes', you'll want this set to '2'.
Lastly, for 'Profile', you'll want this set to 'High'.
You can just leave 'Use B-Frames' toggled on.
Once you've finished changing all of these settings, click 'Done', and you're all set to livestream using your vertical landscape through Streamlabs. All you have to do is select 'Go Live' in the bottom-right corner on Streamlabs and it will send your stream over to YouTube.
If you want to learn how to stream both horizontally and vertically at the same time using Streamlabs, click here! This video will walk you step-by-step through how to do this.
![How to Add Overlays in OBS Studio (Complete Streaming Setup Guide) [2026]](http://www.streamdesignz.com/cdn/shop/articles/Thumbnail_1_917415b4-0055-48d9-9f13-46b188205824.png?v=1782571692&width=1920)


How to Stream to Twitch & YouTube Shorts Using OBS
How to Stream to Twitch & YouTube Shorts Using Streamlabs