Disclosure: Some of the links below are affiliate links. This means that, at zero cost to you, I will earn an affiliate commission if you click through the link and finalize a purchase. Learn more!
In this tutorial, I'll be explaining to you step-by-step how to add a 'Countdown Timer' to your stream utilizing Streamlabs.
Adding Your Countdown Timer
The first thing that you're going to want to do is get Streamlabs desktop opened up and ready to go. If you do not already have this, you can download it here.
Once you get Streamlabs opened and ready to go, head over to 'Scenes' on the bottom left-hand side and press the plus sign icon. Let's name this "Countdown Timer" and press 'Done'.
This is going to give us a new scene. What I like to do is drag and drop this scene to be right underneath 'Starting Soon'.

Now, be sure that the "Countdown Timer' scene is selected and head over to 'Sources'. Press the plus sign icon, select 'Media File', and press 'Add Source'.
This is going to go ahead and ask us to locate the file for our countdown timer.
For this example, I'll be using a countdown timer from Stream Designz. They have tons of different options for countdown timers and overlay packages to choose from.

The countdown timers are sold separately from the overlay packages, but each one has a matching package if you're interested in having everything in your stream match and look professional.
Today, I'll be using the 'Pixel World' overlay package and countdown timer.

These will be animated timers that will count down from five minutes.
Once you have your countdown timer, you can head back over to Streamlabs.
If you purchased your countdown timer from Stream Designz, it will come downloaded as a zip file. Before you can use this, you need to unzip the file. If you're on a Mac, double-click on the zip file and this will create a new folder with the countdown timer inside of it. If you're on a Windows, right-click the zip file and select 'Extract'. This will also create a new folder with the unzipped countdown timer inside of it. Now, your timer is ready to be used.
When you have this folder, go ahead and open it up to locate the file for your countdown timer. Then, select the file and press 'Open'.
You do not want to select 'Loop' for the countdown timer as when this ends you're going to move on to your next scene.
I would suggest that you select 'Close File When Inactive'.

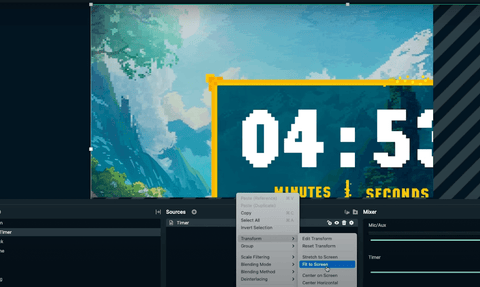
Now, you can go ahead and hit 'Close'. If you find that your countdown timer is too big for the canvas, right-click the 'Timer' source, go to 'Transform', and select 'Fit to Screen'.
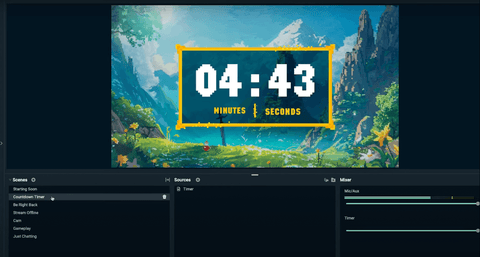
If you go to your 'Starting Soon' scene and then switch to your 'Countdown Timer' scene, you'll see that now the timer starts as soon as you switch scenes.
Having a countdown timer is crucial to helping build up hype for your stream and getting your viewers interested.
If you want to learn how to add any other overlays to your stream using Streamlabs, check out this playlist here where I walk you through step-by-step how to set up all of the other overlays so that your stream can look as professional as possible.

Share:
How to Setup a Stinger Transition in Streamlabs
How to Setup YouTube Sub Badges