Disclosure: Some of the links below are affiliate links. This means that, at zero cost to you, I will earn an affiliate commission if you click through the link and finalize a purchase. Learn more!
In this article, I'll be explaining to you the easiest way to set up YouTube alerts inside of OBS Studio.
Setting Up Your Alerts in StreamElements
The first website that we will be using is Streamelements.com. Once you're here, go ahead and get logged in, and be sure to do this with your YouTube account. After getting logged in, you'll be brought to a dashboard like the one in the picture below.

Come over to the left-hand side and find where it says 'Streaming Tools', select 'Overlays', and then you'll select 'New Overlay'.
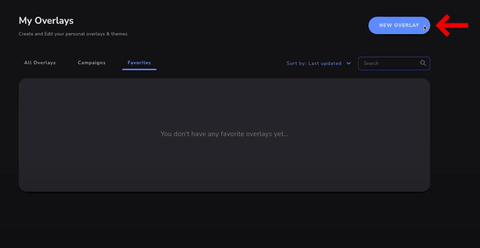
This will bring you to a screen asking you to choose a 'Quality Resolution', which we're going to leave at '1080p'. Select 'Start', and then on the left-hand side, select 'Add Widget'. Then, you will select 'Alerts' and then 'Alert Box'.
This will give you a new sidebar on the left-hand side, and you're going to see that you can set up subscriber alerts, member alerts, superchat alerts, tip alerts, and purchase alerts. For what we're doing, we are going to disable the tip and purchase alerts. To do this, all you need to do is uncheck the box next to them.
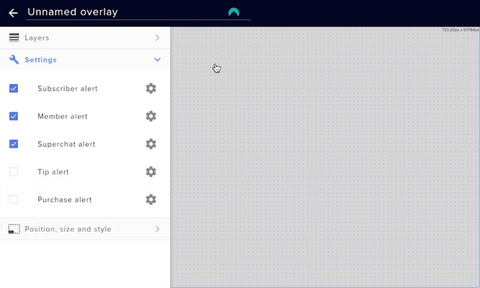
Now, we can go to the bottom of the screen and press 'Emulate', and it will begin to play one of the alerts. I'll test this with 'Subscriber Event', on the screen.

This is just going to be a basic alert, but what we're going to be doing today is creating a much more custom alert that matches your style of streaming.
To do this, start by selecting the gear icon next to 'Subscriber Alert' on the left-hand side.
This is going to go ahead and ask you to change the actual video, which is the animation that you see when you press 'Emulate'. To find this, I'm going to head over to Stream Designz.
Stream Designz has lots of great options for alerts, animated alerts, countdown timers, and more that fit the needs and aesthetics of all streamers.

For mine, I will be utilizing the 'Loadout' package. This is going to come with all of the alerts that we need.

You can also buy the full matching overlay package that will come with a bunch of other overlays to add to your stream so that everything looks really cohesive and professional. This is everything that's included below.
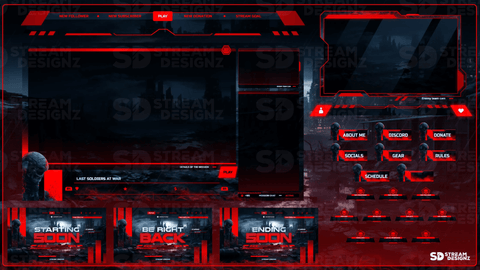

Once you've chosen some overlays from Stream Designz, head back over to StreamElements and select 'Change Video'.
When you get the files from Stream Designz, they come as a zip file, so you do need to unzip these before using them. If you're on a Mac, all you need to do is double-click the zip file and it will unzip. If you're on a Windows computer, all you need to do is right-click the zip file and select 'Extract'. These will both create a new file with all of your alerts in them.
After your file is unzipped, find the file for the 'New Subscriber' alert, select this, and then click 'Open'. Now, you'll be able to see this alert directly inside of StreamElements.
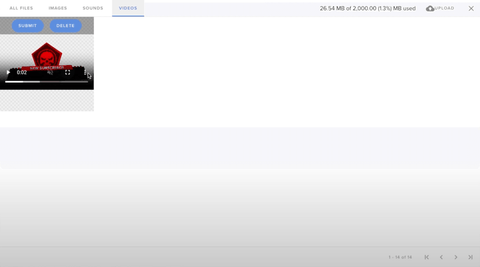
Click on it and select 'Submit'. This will then change the default alert to your new animated alert. So if you go ahead and select 'Emulate' again, you'll be able to see it play.

The issue now is that the text is not aligned with the alert, so there are some customizations that we're going to want to make for this.
The first setting that we're going to see is 'Video Volume Control' and you can just leave this set to '50%'.
For the sound effect, I like to bring this down to about 30%. This is just the sweet spot that I've found. You can use the generic sound that it comes with, but I like to use a custom sound. This way, I can use a copyright-free sound that will let me utilize the sound effects across all platforms without the fear of getting a copyright strike, having my stream muted, or even having my stream deleted.
To find these copyright-free sound effects, I like to utilize Epidemic Sound. They have over 90,000 sound effects for you to choose from that are all copyright-free. On top of this, they have over 40,000 songs that you can use for other parts of your stream.
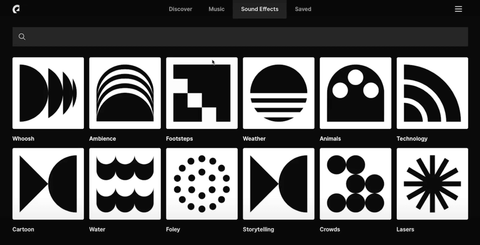
They have a 'Safelist' feature that allows you to link all of your accounts, and it will safeguard these against copyright claims.

I use this for background music, music for videos, sound effects, and any content that I make for social media.
To find the sound that I want to use for my alerts, I'm going to go to the 'Sound Effects' tab and I'm going to search 'Shots' as I am using a Call of Duty-inspired alert. You can go ahead and play any of these sound effects until you find the one that fits your stream.
Once you've found one that you want to use, all you need to do is select the downward-facing arrow button. This will give you a few options for how you want the file to download, so you're going to want to select 'MP3', and then it will download.
Now we can head back over to Stream Elements, press 'Clear Sound', and then select 'Upload Sound'. You'll find the file that you just downloaded from Epidemic Sound, select it, press 'Open', and then you'll have your sound effect inside of StreamElements.
If you go ahead and press 'Emulate' again, you'll be able to hear the new sound effect as the alert pops up.
Now, we need to align the text with the alert.
To do this, we're going to go to 'Layout' on the sidebar and select the third option (furthest right). Then, we'll check the box that says 'Show Subscriber Messages'.
Under 'Alert Message', I like to delete the last part of what it says so that I'm just left with '[name] subscribed'.
For 'Alert Duration', six seconds is the sweet spot.
Now we're going to go down to 'Text Settings' and then to 'Advanced'.
If you got your alert from Stream Designz, you're going to want to put '-125' under the top left margin spot. After adjusting just this, it will be aligned with exactly where we want it to be.

You may notice now that the text comes up before the alert, and this is also something that we're going to want to fix.
Before we get to this, however, I'm going to go ahead and change the color of the alert text. To do this, go under 'Highlight' and you'll see that you can change the color. Since my alert is red, I want the text to be red. This helps everything to be as branded and professional-looking as possible.
After I have the color changed, I'm going to go out of the 'Advanced' settings and back over to the 'Text' settings. I'm going to press the downward-facing arrow to the right of 'Text Settings', and then I'm going to go down to where it says 'Animation Settings'.
Under 'Text Appearance Delay', I'm going to change mine to '1.8s', but you can change yours to your liking for whichever alerts you have.
If you emulate the alert again, you'll be able to see everything in place, with the correct font color, the new sound effect, and the right timing. Now, I'm going to select 'Save' in the top-right corner and I'll name this 'YouTube Alert New', and then I'll hit 'Save' one more time.
You're now going to want to do this following the exact same steps for the other alerts.
Adding Alerts to OBS
Once you've finished customizing the other alerts, you'll press the button in the top-right corner that says 'Copy overlay URL'.
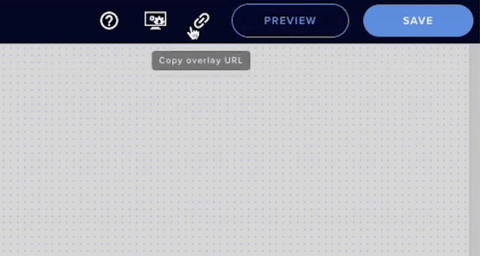
Now, we can go over to OBS Studio and set up the alerts.
I'm going to be setting up these alerts in my 'Just Chatting' scene. Select this scene and then select the plus sign icon under 'Sources' where you'll then select 'Browser'. Let's name this 'New Alerts YT', press 'Okay', and then under 'URL', paste the one that you just copied from StreamElements. You'll select 'Okay' once more and now we can adjust the alert to be where we want it to be.
To see the alert on OBS, head back over to StreamElements, press 'Emulate', and quickly head back over to OBS to see it play.

If you want to be able to set up your overlays (Countdown timer, Starting Soon, Just Chatting, etc...) inside of OBS Studio, check out this video here! It will walk you step-by-step through how to add these to take your stream up a notch.


Share:
How to Stream to YouTube Shorts Using OBS Studio
How to Stream to Twitch & YouTube Shorts Using OBS