Disclosure: Some of the links below are affiliate links. This means that, at zero cost to you, I will earn an affiliate commission if you click through the link and finalize a purchase. Learn more!
If you want to learn how to stream directly from your Xbox to Twitch with overlays to make your stream more professional, then this is the tutorial for you. It will walk you through step-by-step how to do this without using a capture card or having to have a computer every time you want to go live.
Disclaimer: This method is not free, however, it is a great way to get started while you save up to get a capture card or until you can get a computer and utilize OBS Studio.
The website that we're going to be using today is Golightstream.com.
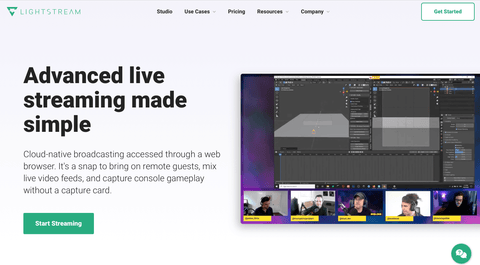
With this site and tutorial, you'll only need to set this up once on a laptop. If you need, you could go to a library, or use a friend's laptop to set this up. After this is done, you can go live on your Xbox and your overlays will automatically be there. People will be able to see these overlays on their phones, laptops, tablets, or whatever device they're viewing your stream on.
Choosing Your Plan
Firstly, let's take a look at pricing.
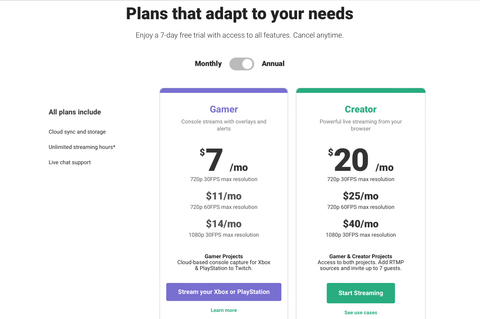
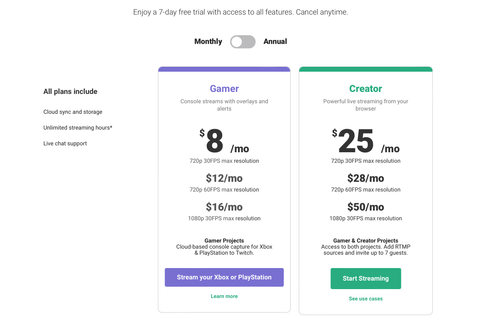
There will be a monthly or annual option for you to choose from. Be sure that you do not go for the more expensive 60FPS plan, Xbox only supports up to 30 frames per second. The 720p plan is also perfect as most people will be watching you on mobile where a higher resolution wouldn't have any difference.
Again, this is just a good way to get started until you are able to get a capture card and start using OBS Studio. For now, choose your plan and we can begin.
Getting Started
Once you've chosen your plan, go ahead and get logged in with your Twitch account. It is crucial that you log in using Twitch as Xbox does not support Facebook or YouTube. Later in this tutorial, I'll explain how you can stream to Twitch and YouTube or Twitch and Kick at the same time if this is something that you're interested in.
Now, to really get started, you're going to have to get some overlays. You can get overlays from anywhere that you would like, but personally, I'm going to be utilizing overlays from Stream Designz. If you check out this website, you'll see that there are lots of great, professional-looking animated overlays for you to choose from.
I'm going to be utilizing the 'Dark Wave' theme, and this overlay package will include everything that I need to make my stream look professional and put together.
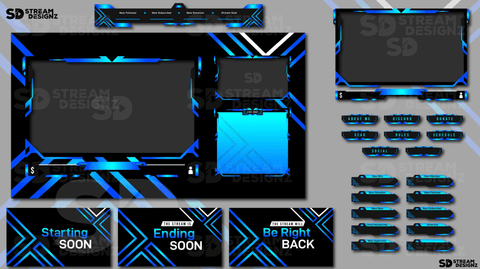
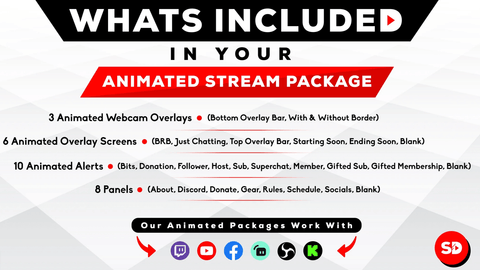
This will include animated overlay bars for just chatting, starting soon, ending soon, be right back, panels, alerts, and webcam overlays.
I'm also going to go ahead and get the 'Dark Wave' theme 'Stinger Transitions' and 'Countdown Timer' from Stream Designz. With all of these overlays, transitions, and the countdown timer, your stream will look so much better and will keep viewers coming back.
Once these are downloaded from Stream Designz, all you need to do is unzip the files and they're ready to use! It's super simple to do: if you're on a Windows computer, all you need to do is extract the file. If you're on a Mac, all you do is double-click the file and it will unzip and create a folder for you.
Setting Up LightStream
After getting your overlays ready, head over to LightStream and click 'My Project' on the top-left side of the screen. We're going to name this 'Live Streaming Xbox' and you can use either '1080p - 30FPS' or '720p - 30FPS'. Once again, remember that Xbox does not support 60FPS.
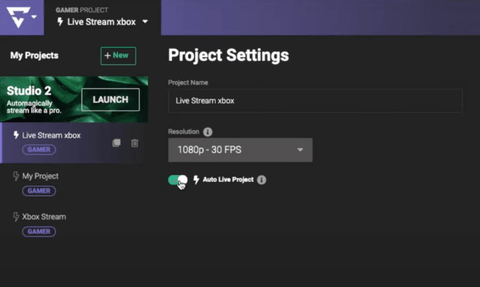
It is very important that toggle on 'Auto Live Project'. This means that after setting this up once, every time you go live to Xbox from Twitch, all of your overlays are going to automatically be present. Later, I'll explain to you how to use your phone as a stream deck so that you can toggle between scenes that are all powered by LightStream.
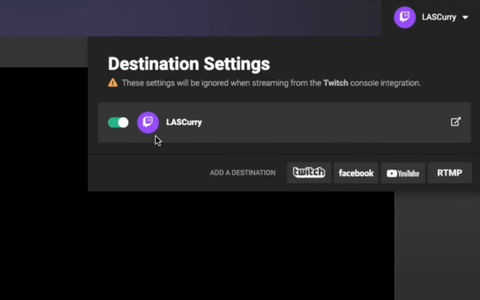
Next, head over to the top-right-hand side and click 'Choose a Destination'. Here, you're going to toggle on your Twitch account.
Once you've done this, you can now begin to build out your scenes.
Creating the Starting Soon Scene
At the bottom of the page, you'll find your scenes. We're going to start by using the existing scene and double-click this so that we can rename it 'Starting Soon'.
Now, press the plus sign icon '+' next to layers on the top-left side of the screen.
Here, we're going to select 'Video Clip' since the overlays are animated and will essentially play as a short video each time they appear. If you are not using animated overlays, then you will just choose 'Image' instead.
After selecting 'Video Clip', you'll press 'Upload Video', and then go through your files to find your overlay package. If you download the package from Stream Designz, each of the different types of overlays will be in its own separate folder.
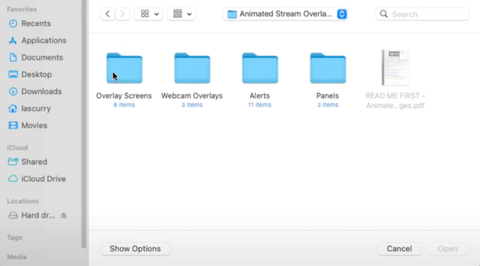
For now, we're going to go into the 'Overlay Scenes' folder and select the 'Starting Soon' file. Once you select this and it uploads to Twitch, you'll see it appear and the animation will play.
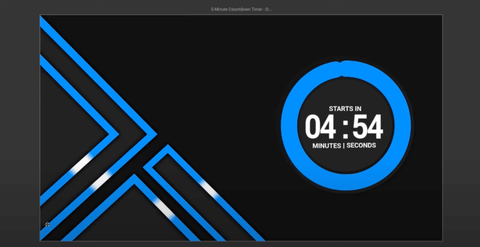
If you would like, you'll have the option here to add a countdown timer. If you go here, you'll be able to add and set up a countdown timer for free.
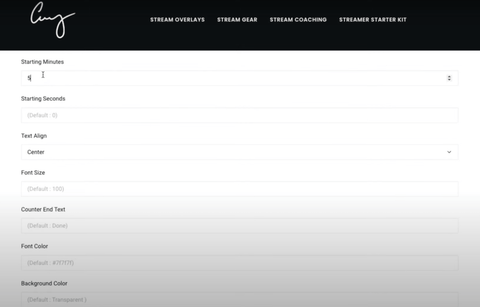
Set the 'Starting Minutes' to '5'. Leave the 'Text Align at Center', set the 'Font Color' to 'White', and if you want to end some text at the end of the timer, you can. I would recommend putting something like 'Stream Starting' if you choose to use this feature. Then, you just have to select 'Get My Timer' and it will open the timer up in a new tab. You'll need to copy this URL and paste it into Twitch. You will not be able to see the timer on the website because it's white, but once you input it to LightStream, you'll be able to see it.
Once you're back on LightStream, to add in the countdown timer, you'll select the plus sign icon again. This time, you're going to press '3rd Party Integration', use 'Browser Source', and paste your URL here. Now, it should appear on top of your Starting Soon overlay.
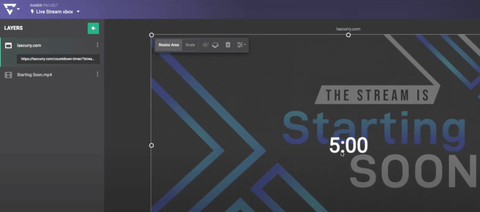
You can reposition this to be wherever you would like it to be and you'll have that timer there.
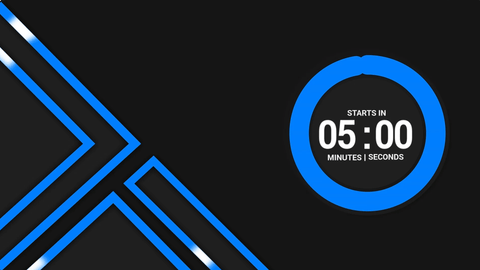
If you, like me, want to have a more professional-looking stream, it's better to use a 'Countdown Timer' overlay. I purchased mine again from Stream Designz so that it will match the theme of my other overlays and come together seamlessly in my stream.
To do this, press the plus icon next to the 'Starting Soon' scene a the bottom of the page. Let's name this 'Countdown'. Then, go back up to the top-left, press that plus icon, and select 'Video Clip'.
Remember, if you downloaded the countdown timer from Stream Designz, all you need to do to use this is unzip the file. You'll just need to find the file, upload it, and then this scene is good to go.
Setting Up the Just Chatting Scene
The next thing that we're going to do is set up the 'Just Chatting' scene. To set up this scene, hit the plus icon at the bottom of the screen to add a new scene and name this 'Countdown Timer'.
Then, head back to and select the other plus icon at the top-left by layers and click 'Video Clip'. Press 'Upload Video' and find the file within the overlay package for the just chatting scene that you downloaded.
Once you upload this, you'll now be able to see the 'Just Chatting' scene.
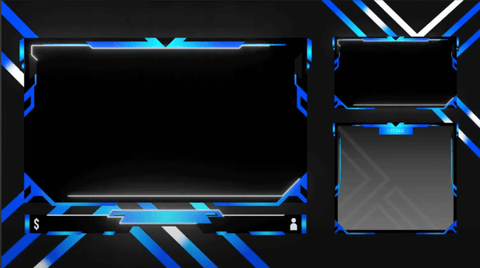
Now, we want to add our gameplay to this. To do this, click on the plus sign next to layers, and select 'Game Source'. What you'll need to do now is adjust the gameplay box to fit either in the center box of the 'Just Chatting' scene or in one of the side boxes.
Where you put this all depends on what camera you'll be using. If you're going to be using the webcam from your Xbox, then this video will be restricted to the top-right box. However, if you have a laptop next to you that you're using the webcam to connect directly to the live stream, then you'll have some more flexibility on where the gameplay can go.
Typically, I'll go ahead and leave the gameplay in the center and utilize the top-right for my webcam. If you don't want to have your webcam here, you can also duplicate the 'Game Source' and add a photo of your logo or whatever else you would like to go in that top box.
Next, we're going to add in the 'Chat'. Head over to Rainmaker.gg, which is a free site powered by LightStream.

Go ahead and get logged in here, then on the left-hand sidebar, you'll see 'Overlay'. Click on this and then select 'New Overlay'.
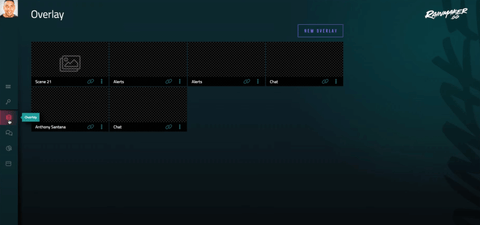
Let's name this 'Twitch Chat', and leave the 'Live Background' and the 'Editor Background' as transparent. Press "Create Overlay'. Next, select 'Layer' and then click 'Chat'. This is going to give you the chat box in the translucent form that we want.

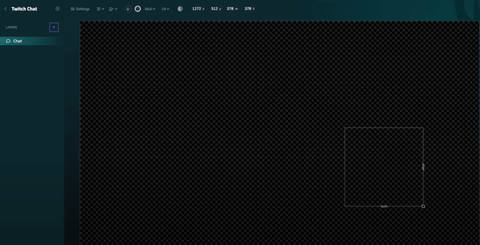
Now, hit 'Save', and then you'll see that your chat shows up under 'Layers'. We're going to copy the URL (the button is in the bottom-right corner) and then go back over to LightStream.
Once you're back here, press the plus icon by 'Layers', and select '3rd Party Integration'. From here, select 'Browser Source' and paste the URL that you copied from Rainmaker.
After this loads in, it will cover the full screen and you'll have to alter the size to fit in the bottom-right box of the Just Chatting overlay. As you're resizing this, you may get a notification that says 'Misconfigured'. All this means is that it's not the right size.

To adjust this, go back to Rainmaker. Next to layers, press the plus sign button, and then select 'Video'. If you double-click this, you'll be able to add the video that you want, and now you should be able to place this wherever you need it to be inside of LightStream.
Once you have your chat going, you're going to want to run a test. The easiest way to do this is to press the green arrow that sticks out on the right side of the screen. This will open up the chat, and you can type in 'This is a test.' After you send this, the chat should appear on the screen.

As you can see, the text box isn't in the right place, and now is a good time to fix that. To do this, come back over to Rainmaker and delete the 'Video' layer that we added earlier. Now, all we want to do is shrink the chat box a little bit and place it closer to where it looks like it should go on LightStream.
Now, you'll just have to keep running tests until your chat box is just where you want it to be. Once it's in the right spot, you can begin to adjust the actual size of the text by going into Rainmaker and going into settings using the three dots next to 'Chat' under layers.
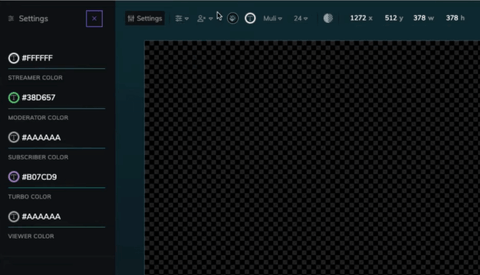
Here, you can change the color of the chat, the size, and a few other things. This is going to be different for everyone, and you just have to set it up according to the overlay package that you purchased and the way that you want it to look.
Setting Up the Gameplay Scene
Next, let's focus on adding in the gameplay.
In the bottom-right corner, you'll find your Audio Mixer. This is where you'll find the option to adjust the volume for any alerts (which we'll get set up soon) and that sort of thing.
Let's go ahead and add a new scene which we'll name 'Gameplay'.
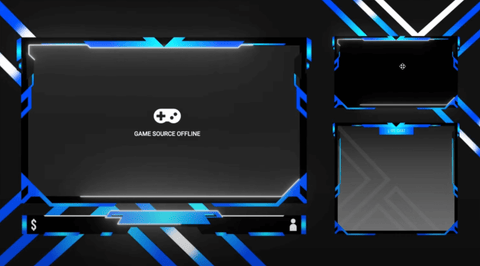
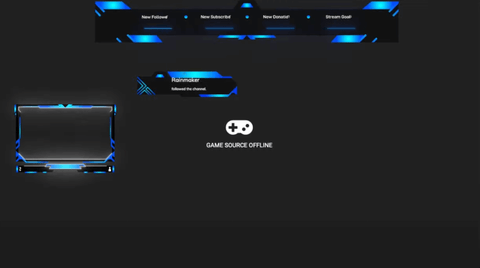
Once this is in place, press the plus icon by layers, select 'Video Clip', and then press 'Upload Video'. Now, go into your files and find the 'Overlay Bar' inside of the 'Overlay Screens' part of your overlay package.
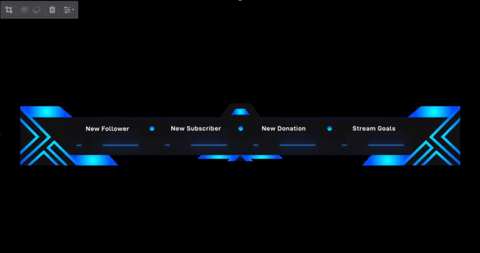
This is where you'll have new followers, new subscribers, new donations, and stream goals. You'll place this in the middle-top of your screen.
Now, you're going to add in your game source. This is going to be where your game comes into your live stream directly from your Xbox.
Press the plus sign button by layers again, this time select 'Game Source'.
If you click here or reference the photo below, this will show you a grid of where to place things on your gameplay scene.
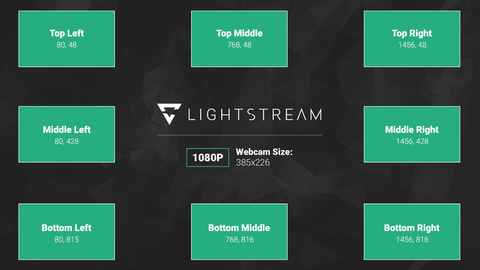
You're going to want to save this image to your files so that we can upload it to LightStream and use it as a reference.
Once you come back to LightStream, hit the plus icon, and select 'Image'. Click 'Browse Files' and find the file for the reference grid that you just saved.
We only need to use this grid to know where to position our webcam, once we've done this, we can delete the reference image.
To add the 'Webcam' overlay, press the plus icon, select 'Video Clip', then 'Browse Files', and find the webcam overlays in your overlay package.
If you downloaded the Stream Designz pack, you'll see that you have three different options for webcam overlays that you can choose from. Personally, I like to choose the option that includes the border, but you can test each of these out and see which one works best for you.
Once this is uploaded, you're going to align it with where the camera is going to be on your Xbox (middle-left).

With this in place, you can delete the reference image.
Adding the Be Right Back Scene
To begin adding the 'Be Right Back' scene, click the plus icon at the bottom of the screen to add a new scene. We're going to name this 'BRB'.
Next, press the plus sign icon next to layers and select 'Video Clip'. Browse your files, find your overlay package, and choose the 'Be Right Back' overlay.
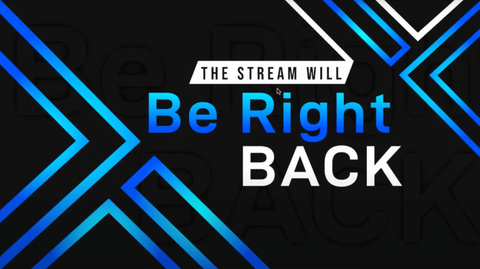
Once this is uploaded, You'll have your 'Be Right Back' scene all setup.
Adding Your Stream Ending Scene
For this, we're going to follow the same steps as the previous ones. Start by adding a new scene using the plus sign button a the bottom of the page. Let's call this scene 'Stream Ending'.
Then, head back up by layers and select the other plus sign icon, choose 'Video Clip'. Locate your overlay package in your files and select the 'Stream Ending' overlay.

Once this is uploaded, you're all done with this scene.
Adding Stinger Transitions
Now, we're going to be adding stinger transitions to lessen the effect of switching between scenes. Without these, there is a hard cut between scene to scene that interrupts the flow of the stream and makes you appear to lack professionalism. This little detail makes a lot of difference in how your stream looks.
I'm going to start off on my 'Countdown Timer' scene. Press the plus icon by layers, and select 'Video Clip'. Head into your files and find the transitions package that you've downloaded.
Again, I got mine from Stream Designz. These do come in a separate package from the overlays, but I would highly recommend that you invest in these to take your stream to the next level.
Once you've found your transitions, select the file and upload it. After uploading this, you'll see it appear on the screen.
For the transition to work correctly, you're going to want to make sure that it is selected under 'Layers', then you're going to press the furthest right icon at the top of the scene.

You do not want this to be set to 'Loop', instead you want this to be set to 'Stop and Hide'.
While you're setting this up, it's going to keep looping, so for now it's going to look a little weird. However, once this is all setup and you're switching between scenes, it will look normal and will add a nice touch to the scene change.
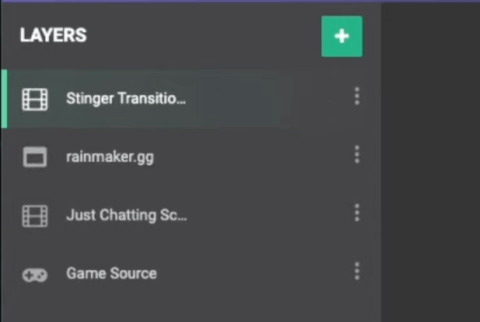
Now, you're going to add this to every single scene. Be sure for each of them that you're going in and selecting the 'Stop and Hide' setting or else they will not work properly.
These also need to be placed all the way at the top of your list of layers. If it's not at the top, then this will not work correctly or play as you transition between scenes.
These transitions are only going to last for two or three seconds, but they're going to make a big difference in how professional your stream appears to your viewers.
Setting up Alerts
To begin setting up alerts, I'm going to start under the 'Gameplay' scene. For right now, I'm going to hide the 'Stinger Transition' layer so that it isn't distracting as we set up the 'Alerts'.
After doing this, we're going to go back over to Rainmaker. You'll need to exit out of what we were working on earlier and select 'New Overlay'. Let's name this 'Twitch Alerts' and then select 'Create Overlay'.
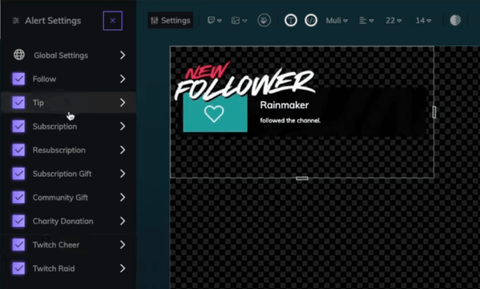
Press the plus icon and select 'Alert'. You're going to see a list of different alerts that you can choose from. There are options for followers, tips, subscriptions, resubscriptions, subscription gifts, community gifts, charity donations, Twitch cheers, and Twitch raids.
Right out of the gate, they're going to give you some default alerts that you can utilize. However, inside your Stream Designz overlay package, alerts are included that will match the theme of the overlays that you purchased.
I'm going to explain how to set up one of them, and then the rest will be set up exactly the same way.
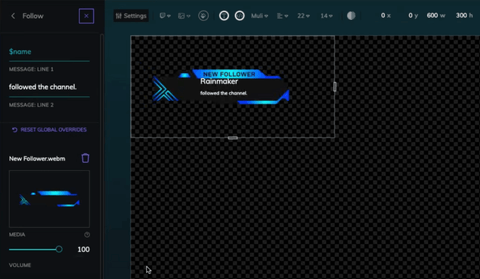
We're going to set up the 'New Follower' alert to begin. Start off by deleting the default overlay and then click the upload icon to be able to search your files to find your custom alerts. Once you've located the "New Follower' alert, upload this, and then we see what it looks like.
To see the alert in action, press 'Test' at the bottom of the page, and then hit 'Follow' to see the alert.
With this alert setup, copy the URL in the bottom-right corner and head back over to LightStream.
Once you're back on LightStream, under the gameplay scene, press the plus icon by 'Layers'. Select '3rd Party Integration' and paste the URL. You'll see that the alert will show up and you can place this wherever you would like.
To run a test and make sure this is really working, flip back over to Rainmaker and run another follower test. Quickly switch back over to LightStream and you should see the alert playing.
Everything is coming together well, and it's all looking really professional at this point.
Adjusting Your Xbox Settings
At this point, it's time to switch over to your Xbox so that we can finish everything up.
Once you're on your Xbox, go ahead and hit the middle icon on your controller. Scroll over to 'Capture and Share', then select 'Live Streaming'.
It's super important that when you're on the 'Live Streaming' page, come over to 'More Options', and make sure that the 'Resolution and Bitrate' is set to exactly the same as the LightStream plan that you signed up for.

If you signed up for the 1080p at 30FPS plan, have this setting set to 1080p. If you chose the 720p plan, have this set to 720p.
Scroll down just a bit now to 'Destination'. You don't want this set to Twitch even though that's the site you'll be streaming on. This needs to be set to LightStream Studio.
With this in place, go back out of 'More Options' and head to 'Camera Options'. This is where you will select and position the webcam where you placed it on LightStream.
Up above just a little bit, you'll see 'Stream Name'. You're going to want to give this a title, and all you need to do is input that title here.
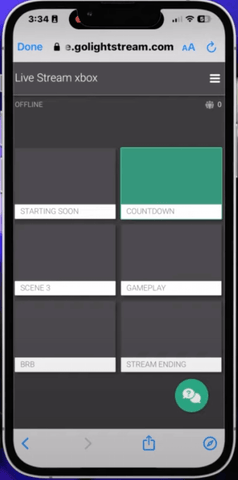
Using the LightStream Mobile App
If you remember from earlier, I said that I would explain to you how to use your phone as a scene deck during your stream. Now we're going to learn how to do this.
With this app, you'll have access to all of the scenes that we set up earlier. You can use this to switch between all of your scenes during your stream.
To start, go to remote.golightstream.com, select 'Twitch', and then get logged in to your account. This is going to ask you for a code that it has likely sent to your email as a security feature. It's also going to ask you to authorize LightStream to have access to your Twitch account, which of course you'll want to allow.
Once you're logged in, you'll be able to see all of the scenes that you created earlier here.
Now, whenever you go live, all of your overlays, transitions, and your countdown timer will automatically appear. If you want to change scenes throughout your stream, there's no need to have a computer to do so, all you need is your phone.
If you want to be able to stream from your Xbox to Twitch and YouTube at the same time with all of your overlays, watch this video here!
If you want to learn how to stream to Twitch and Kick at the same time, check out this video here to learn step-by-step how to do that!
![How to Add Overlays in OBS Studio (Complete Streaming Setup Guide) [2026]](http://www.streamdesignz.com/cdn/shop/articles/Thumbnail_1_917415b4-0055-48d9-9f13-46b188205824.png?v=1782571692&width=1920)


How to Split Audio in OBS on Mac (WITHOUT ANY SOFTWARE)
How to Setup Spotify Now Playing Overlay in OBS Studio