Disclosure: Some of the links below are affiliate links. This means that, at zero cost to you, I will earn an affiliate commission if you click through the link and finalize a purchase. Learn more!
In this tutorial, you'll learn how to improve the quality of your webcam directly inside of OBS Studio, regardless of the webcam that you have!
Adding Your Webcam
The very first thing that you're going to do is make sure that your webcam is added. Start by going to your 'Just Chatting' scene inside OBS Studio.
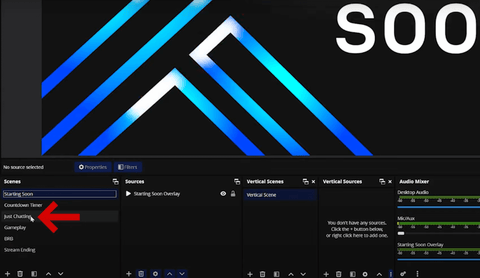
If you are interested in any of the overlays that you see in this tutorial today, be sure to check these out on Stream Designz. There are lots of different options of animated overlays, countdown timers, and so much more for you to choose from that are all very easy to set up and use.
Now, right out of the gate, you'll see that in this tutorial, I'm using a $27 webcam.
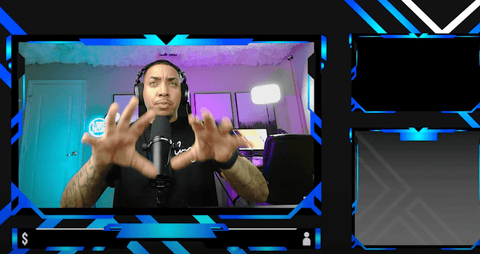
This camera has surprisingly good quality right out of the box. It is by far one of my favorite budget-friendly webcams. You can check it out here! https://geni.us/2PurV2A (Amazon)
Even without adjusting any of the settings, you could get away with using this camera since the quality is so good straight out of the box.
Very important: you want to make sure that you have good lighting. If you do not have lights, I'll be explaining some ways that you can customize your settings in OBS to help with this. If you do have lights, or if you're looking to get some, try to find and purchase lights that you can adjust the brightness of.
Adjusting Your Settings
Once you have your webcam added, select 'Properties' which should be right above 'Scenes'.
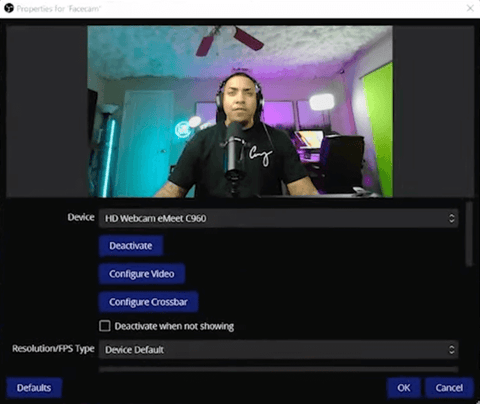
The first thing that I like to do here is to deactivate and then reactivate my webcam. This just sort of refreshes it and gives you the opportunity to begin customizing it.
Now, scroll down some and find where it says 'Resolution/FPS Type'. Instead of leaving it on 'Device Default', we're going to select 'Custom' and this will give us a lot more options.
For resolution, I want to make sure that I get the highest resolution that my webcam offers. For me, this is '1920x1080'.
As for FPS, I'm going to choose 'Highest FPS'. This will help to make the video look smooth and have as little lag as possible.
For 'Color Space, I like to use 'Rec. 709' as this is going to give me the highest level of color accuracy.
At this point, you may see that the webcam is having some issues with lag or going in and out. All you need to do to fix this is to select 'Deactivate' and then 'Reactivate' again. This just happens sometimes when you change the webcam settings a bit too fast. After you do this, you'll see that everything should be working properly again.
For the 'Color Range', select 'Full' as this will give you the most color that you can get out of this webcam.
For 'Buffering', keep this set to 'Auto-Detect', and then select 'Okay'.
Customizing Your Settings
Now that we have the default settings in place, we can go ahead and customize the webcam's look even more.
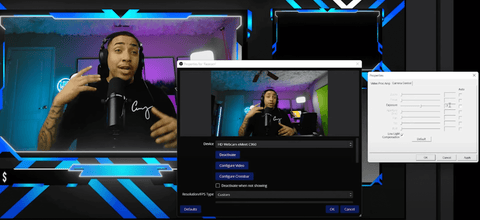
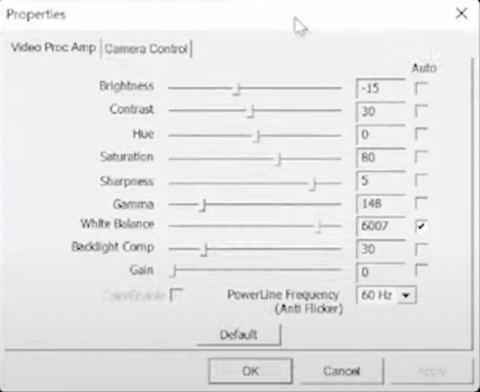
To do this, start by going to 'Sources', select 'Facecam', and then click 'Properties'. From here, you're going to select 'Configure Video'. It will bring up a screen just like the one seen below.

From here, I like to start by going to 'Camera Control' so I can turn off the exposure.
If you look at the photo below, you'll be able to see that the left side of my face is overexposed and washed out.

Once I turn this off, it will be left at -7, and the side of my face will no longer be overexposed.
This also helps to have any lights that may be around you to not be burned out as well. You may look at this now and think, "It looks really dark,' but we can always adjust the brightness to change that.
Once you've done this, click 'Video' in the top-left corner of the 'Properties' tab. From here, go to where it says 'Brightness'. For this, I'm actually going to take it down to about -15. I know you've got to be thinking, "Why are you going darker?"
There are two ways that you can do this. If you have lights, which I have two Elgato Key Lights, which you can check out here! https://geni.us/4yjEG2e (Amazon), and with these I can go ahead and go brighter directly on the lights rather than in my settings. Right now, they're set to 47%, so I'll bring them up to 100% and my brightness will be pretty spot-on.
However, since not everyone has lights or lights that cannot be adjusted, let's learn how to do this directly in the settings.
The next thing that you're going to change will be the 'Contrast'. I like to bring this down just a little bit so that it isn't too overpowering.
For 'Saturation', this will add just a little bit more color to the webcam video. It specifically adds a little bit more redness, which is how I prefer to have it. I'll up this just a little bit to about 80 and this will give everything a much more full color.
As for 'Sharpness', I like for this to be at about 5. It will just add more detail to the show and you can adjust this as you see fit.
Now when you get to 'Gamma', this is going to go ahead and increase the brightness of your image. I'm going to go ahead and take this to about 148, and now my lighting is starting to look really good and accurate.
For the 'White Balance', I like to keep this set to 'Auto'. The reason why is because for some reason, it just adjusts so much better. If you turn it off, you'll probably find that your image is too blue, and of course, you could go in and adjust this, but it's just easier and more efficient to leave this set to 'Auto'.
For the 'Backlight Comp', I'm going to leave this set to '30'.
Lastly, for the 'Gain', I'm going to leave this at '0'.
Now you can go ahead and select 'Apply', then select 'Okay', and select 'Okay' one more time.
One of the biggest things is that when you close OBS, you're still going to have all of these settings, but be sure that you right-click on 'Properties', come to 'Configure Video', and go ahead and screenshot your settings just in case it for some reason your settings get deleted.
With all of this done, you now have a webcam image that looks professional and high-quality. This is really going to help give your viewers a better experience, and it will add an extra level of professionalism to your streams.
If you have your video looking good, but your audio isn't as great, be sure to check out this video here to learn how to have much better-sounding audio regardless of what kind of microphone you own!

Share:
This $27 Streaming Webcam is Insane
How to Use Loupedeck Live S to Manage Your Stream