Disclosure: Some of the links below are affiliate links. This means that, at zero cost to you, I will earn an affiliate commission if you click through the link and finalize a purchase. Learn more!
In this tutorial, I'll be walking you through step-by-step how to add your YouTube 'Chat Overlay' in OBS Studio.
Getting Started
The first thing that you're going to do is get OBS Studio open. Typically, you're going to add your 'Chat Overlay' to your 'Intermission' scene. In this scene, you'll also have your video, your gameplay, and then an empty box for your chat overlay.

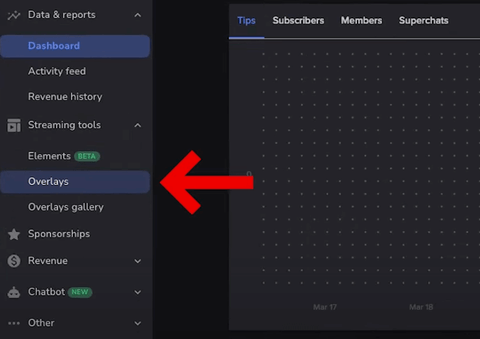
Next, you're going to come to StreamElements and get logged in with your YouTube account. Once you do, you'll be brought to a dashboard like the one below.

On the left-hand side, where it says 'Streaming Tools', select 'Overlays'.
This is going to bring you to a new dashboard, and you'll select 'New Overlay'. This will bring you to a new tab and will ask you to select a resolution, we'll just leave this set to '1080p'.
Next, you'll press the plus sign icon in the bottom-left corner. Then, you'll go to where it says 'Static/Custom'. You'll select 'Video' if you have animated overlays or 'Image' if you have static overlays.
What's going to make this a bit easier is that you can bring in your 'Just Chatting' to StreamElements. This way, you can align it directly with the chat box on your 'Intermission' scene.
The overlays that I will be using for this are from Stream Designz. They have tons of animated overlays for you to be able to choose from.
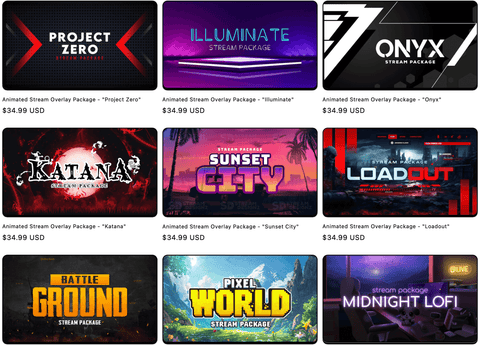
For this example, I'll be using the 'Loadout' animated overlay package.
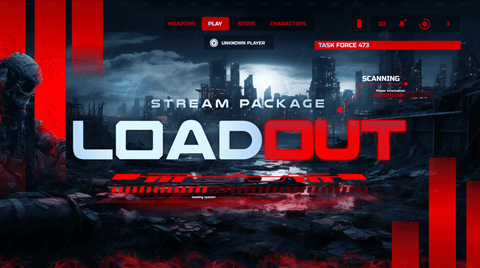
This package is going to come with everything that you need to make your stream look more professional.
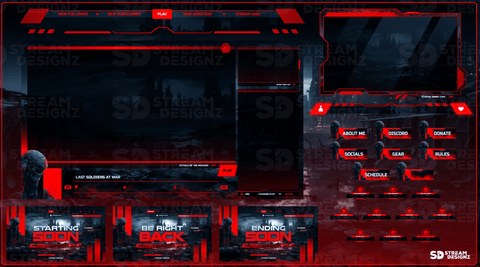
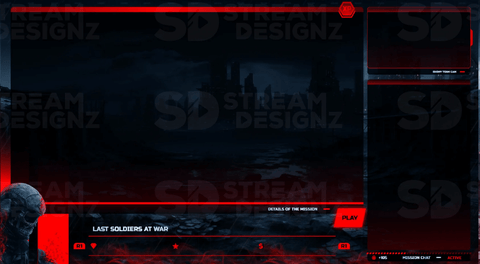
You can see the 'Just Chatting' scene that I'll be using today below.
Adding In Your Overlays
Once you have your overlays, you can head back to StreamElements.
If you purchased your overlays from Stream Designz, they will come downloaded as a zip file. Before you can use them, you'll need to unzip the file. If you're on a Mac, double-click the zip file and it will create a new folder with the overlays in it. If you're on a Windows, right-click the zip file and select 'Extract'. This will also create a new folder with the unzipped overlays inside of it. Now, your overlays are ready to be used.
Then, with these ready to be used, select either 'Video' or 'Image' depending on whether you have animate or static overlays. Since I have an animated overlay package, I'll select 'Video', and then I'll select 'Change Video'. Press 'Upload File' and locate the folder with all of your overlays.
If your package is from Stream Designz, you'll go to the folder titled 'Overlay Screens', select 'Just Chatting', and press 'Open'. This will then bring that overlay into StreamElements for you.
If you already have your overlay uploaded, then all you need to do is press 'Submit' on the 'Files' screen.
When this shows up on your screen, it'll be a little bit smaller than you want, so to fix this, go to 'Video Size' and select 'Auto'.
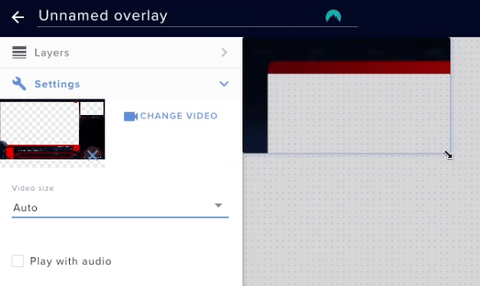
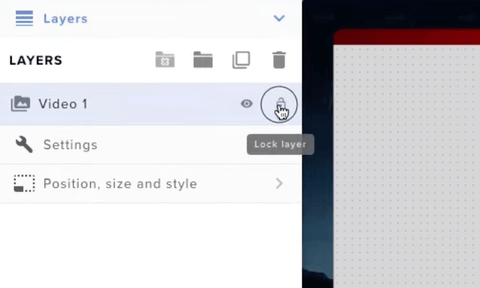
Then, you can drag one of the corners until it's the right size and in place. Once you've done that, go to layers, and lock the overlay into place.
Adding In Your YouTube Chat Overlay
Next, we are going to add the YouTube chat overlay.
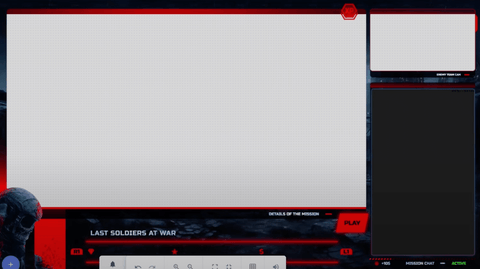
To do this, press the plus sign icon in the bottom-left corner, select 'Streaming Tools', and then 'Your Stream's chat'. It will pop up on your overlay, and you'll drag it into place. You'll want to make it just a little bit smaller than the box that you have for the chat.
Once you have this in place, you can come to where it says 'Settings' on the left-hand side.
For the 'Theme', you can select 'Dark Chat', 'Checker Chat', 'White Chat', or 'Custom'. For now, we're going to select 'White Chat'. Then, you'll select 'Save' and let's name this "YouTube Chat Overlay".
When you have this saved, you don't need your 'Just Chatting' scene anymore. So, you'll come back to layers and press the eye icon next to 'Video 1'.
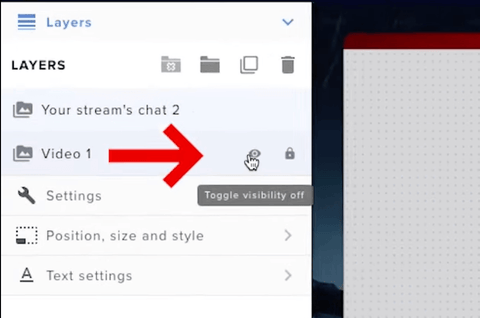
This will toggle the visibility off for the 'Just Chatting' scene.
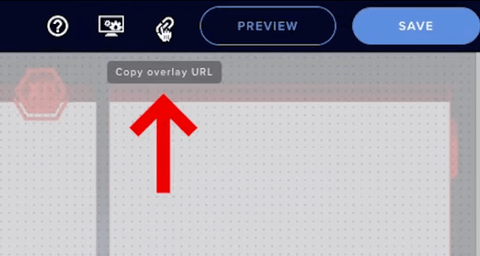
Now, you can hit 'Save' again and press the paperclip icon to copy the URL.
Then, head back over to OBS Studio.
Adding Your Chat Overlay to OBS
Once you're back on OBS, head over to the 'Intermission' scene. Press the plus sign icon under 'Sources' and select 'Browser'. We'll name this 'Overlay YT Chat' and press 'Okay'. Now, we're going to paste the URL that we just copied from StreamElements.
This is super important: you'll need to set the 'Width' to '1920' and the 'Height' to '1080'. Then, scroll down and select 'Refresh Browser When Scene Becomes Active'.
Now, you can press 'Okay' and you'll be able to see your chat pop-up.

Since you can see that your chat has appeared in the correct spot, you can now lock it in 'Sources'.
Next, head back over to StreamElements and select your chat. Then, go into the chat settings. For the 'Theme', change this to 'Custom'. This is what's going to make your chat transparent. Once you've done this, hit 'Save', and head back to OBS. Now, you'll see that your chat is transparent here as well.

When you go live, your chat will now pop up here.
If you go to 'Sources', right-click on 'Overlay YT Chat', and select 'Copy', then you can go into your 'Gameplay' or any other scene and paste this in.
Now, if you want your stream to look even more professional by adding all of your overlays in OBS Studio, be sure to check out this video here where I'll walk you through doing that step-by-step.

Share:
How to Setup Twitch Sub Badges
How to Setup Emotes for Your YouTube Streams