Disclosure: Some of the links below are affiliate links. This means that, at zero cost to you, I will earn an affiliate commission if you click through the link and finalize a purchase. Learn more!
In this tutorial, I'll be explaining how you can turn your Twitch or Kick streams into TikToks, YouTube Shorts, and Instagram Reels so that you can grow your channel.
The great thing about this is that you don't need to do any kind of editing, it's automatically done for you. This allows you to be able to post clips faster than ever. I've been doing this for the past few weeks when I stream for three or four hours every night on Twitch at 9 P.M. Eastern time.
Choosing a Plan
The software that we'll be using today is Powder.gg. You'll see right off the bat that this is not free to use. It does cost $19.99/month if you choose the monthly plan, or it's $99 for the yearly plan.
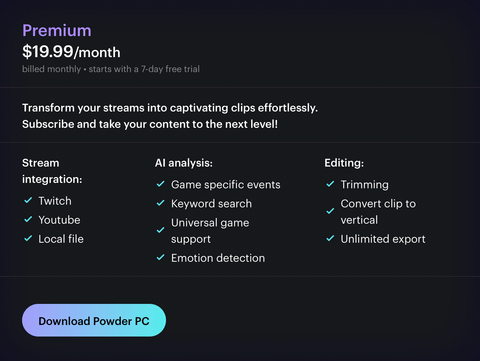

Powder has been very generous, so if you use the code LASCURRY50 then you'll get 50% off of the yearly plan, so that comes out to only about $4/month ($50/year).
With this software, you'll be able to have what is essentially your own editor for all of your clips. I truly believe that this is an amazing investment; it has saved me hours and hours of editing in just this last week alone. Again, you'll want to consider if this is right for you, but it is a great deal and great software.
Getting Started
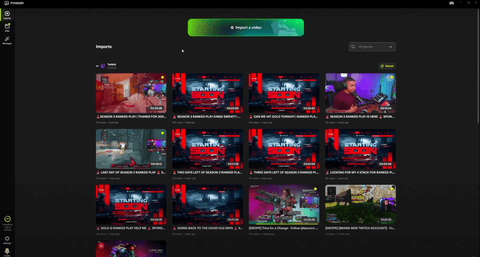
Once you've chosen a plan and used the discount code for the yearly, you're going to want to download the Powder PC app. After this has finished downloading, you'll be brought to a dashboard just like the one you can see below.
Initially, you aren't going to have anything here because you'll first need to connect your Twitch and YouTube accounts. You can also upload your Kick VODs if you want to be able to use those as well.
On the bottom left-hand side, you're going to come to where it says 'Settings'. What we're going to do here is make sure that we have the right folder selected for where you want your VODs, clips, and montages to go.
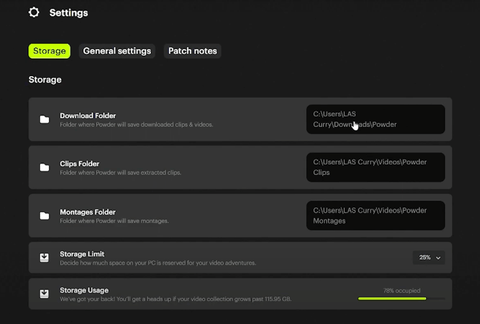
You'll select these folders here and you'll also be able to see how much storage you have. You have the option to decide how much space on your PC is reserved for your video adventures. Typically, I'll keep this set to 25%, but you can have it set to 5%, 10%, 25%, or 50%.
Once you have this done, head to 'General Settings' where you can decide if you want Powder to 'Start at Boot'. I typically keep this turned off because I only utilize Powder after I've finished streaming.
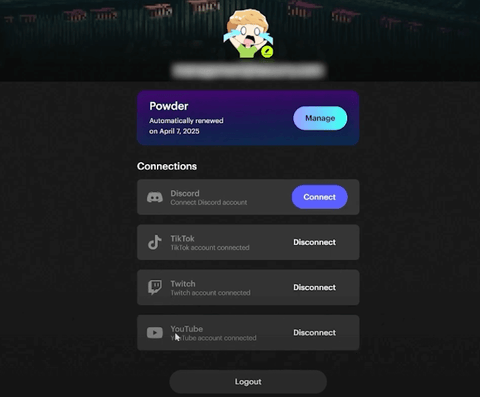
Now, head to the bottom left-hand corner and select 'Profile'. This is where you're going to be able to connect your YouTube, Twitch, TikTok, and Discord accounts. The reason that you'll want to link all of these is so that when you bring in your Twitch and YouTube streams, you'll be able to automatically upload them to TikTok.
After you've linked all of your accounts, come to where it says 'Import' in the top-left corner and you'll see here that it will import all of your Twitch VODs. Your YouTube videos and livestreams.
Downloading Your Stream
If you select 'Import a Video' at the top of the page, then you can import any of your videos from Twitch, YouTube, or from your computer. You could also drop a link to a YouTube, Twitch, or Kick stream and it will pull in the actual clips.
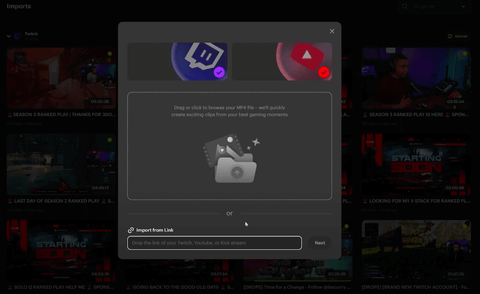
Once you've done that and you have your VOD here, the first thing you're going to do is click on it and open it. When you do this, it will go ahead and begin the downloading process.
Now, it's going to ask you to select a category. These categories will show you all of the games that Powder supports. If the game is listed, it will go ahead and pull in all of the events that you can see below.

It will pull in your victories, defeats, kills, death, and game summaries.
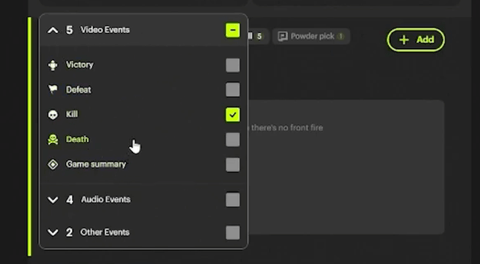
If the game is not listed, it will still be able to grab your laughter, screaming, and your 'Powder Pick'. The 'Powder Pick' is a moment that Powder picks that it believes will be the best moment to make a clip from.
It can also make clips from when your loudness, volume, or chat spikes. It can even create community clip spikes which is when your viewers are clipping your stream as you're live.
Once you've selected your game (I'll be selecting Call of Duty), you'll have the option to select the language that you're using as well. If you're streaming in English, then you would select English, but if you're also streaming in Spanish, then you can select both.
Now, select 'Analyze', and it will begin to download this VOD and start picking out the clips that it thinks will be the best from your stream.
Typically, what I like to do when I end my stream is to come in here, let it download, and then the next day I'll have all of the clips. Of course, it doesn't take that long, but that's the workflow that I've found works best for me.
Editing Your Clips
Once it's done uploading, it will look like the example below.
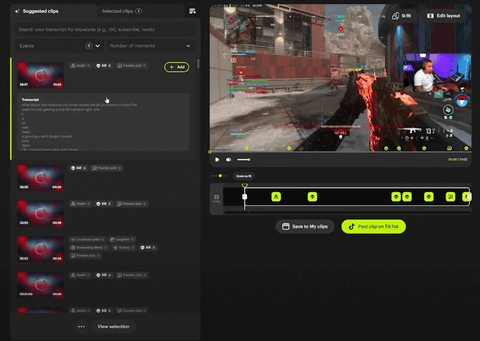
It's going to have given me all of these different clips. There are tons of clips that Powder has chosen automatically without me having to do anything other than upload the stream.
One of the things that I like is that you can say during your stream, "Hey, that's a clip," or "Hey, I got him," and then you can search for these moments in Powder and it will pull up all of the clips where you said these things.
You can see in the timeline that it will show the "Powder Picks".

It will also show buttons for 'Death', and for 'Keyword' where you've searched for a specific phrase. You can then drag the slider and move it over to the moment where you said this and hear yourself saying the phrase you searched for.
That's going to be an amazing feature. It will give you the opportunity to think while you're live to say specific things or have specific conversations with a viewer that you can search for later. Remember too, this is not just for gaming, but also for 'Just Chatting' streams.
Definitely don't forget that you can just search for these exact moments that you want to use. You should also remember that you select and deselect under 'Video Clips' to find, say, only the clips that you had a kill in, or ones where you had a victory. You can filter this down to any of the specific options that they offer in order to find the exact clip that you're looking for.
Then, you're able to go through these clips and see things like, "Oh wow, I got four kills in the beginning. Let me look at this." You can then press the play button and it will take you to that section.
Another great thing is how easy it is to cut out portions of the clip that you don't want. If there's a lot of dead air before the action, all you need to do is drag in the beginning or end of the clip and it will cut out that extra time.
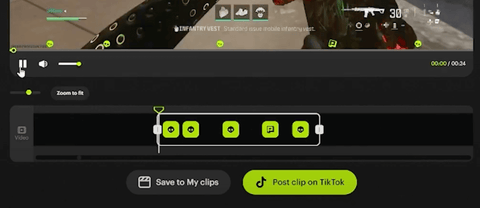
Now, the clip can start right when you're about to make a kill or get into the action.
Something to keep in mind, especially if you're playing Call of Duty, is that Powder will pick up on any overlays that you might have that say "First Kill" or things like that. You want to make sure that these are visible and not blocked so that the AI can accurately pick up on these events.
Making your Clips Vertical
You may be wondering at this point, "My clips are still horizontal, how am I going to post this to TikTok, YouTube Shorts, or Instagram Reels?"
All you need to do is press the '9:16' button in the top-right corner of the clip.
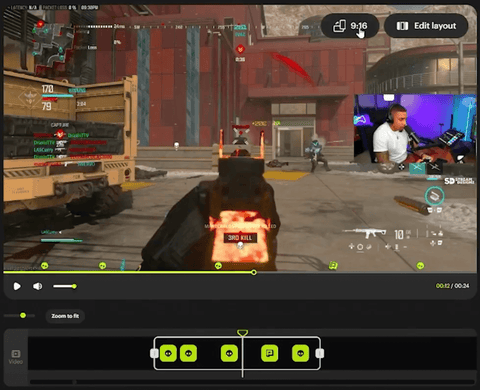
This is going to give you a layout here for your vertical clip.

It may not be perfect, but you can select 'Edit Layout' in the top-right corner of the clip box and change this. This is going to open the editor and you'll be able to see that you can move the different boxes, adjust them, make them smaller, and do what you need to get this to look the way that you want it to.
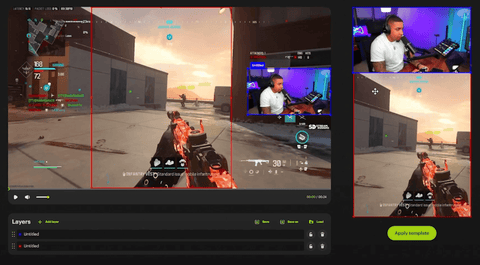
You can adjust this to show what you want to be seen.
You could make the space for your camera longer and adjust things according to that. Once you have the camera in place, you would come to your second layer, the gameplay, and adjust this by making it more centered.
Let's say that you also want to be able to pull in the wins or what the score is, but it doesn't fit in your gameplay box. To do this, go down to 'Layers' and select 'Add New'. This is going to give you a new layer with a green box on your screen that you can use to show this.
You'll take this new box, resize it, and place it so that it shows your wins and score. Then, you can just grab this and move it around the vertical layout until you find a place that you like.
Again, you can adjust this to show any elements of your stream that you would like and then you can adjust them to show up where you would like for them to. You can also move certain layers under other ones if you do not want them to show up anymore.
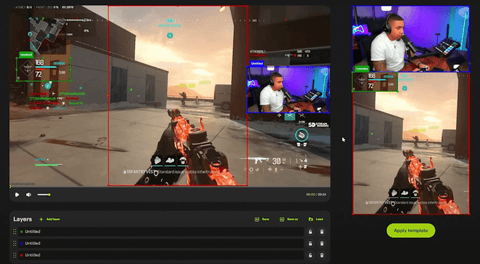
One of the other really great things about Powder is that once you have this layout set up the way you like, you can just press 'Apply Template', and it will apply this to all of your other clips. This will save you so much time since you will not have to go through and edit every single clip.
If you go to a different clip after doing this, you'll be able to see that the score will appear along with the other clips and the camera box will be larger than it was on the original template.
Creating a Montage
Here's where it gets even better. Let's say that the first clip that I edited is the one that I want to use. I can go ahead and select 'Save to My Clips' or I can select 'Post Clip on TikTok'. I'll be selecting 'Save to My Clips' and you'll see that it has been uploaded to the 'Selected Clips' page which you can find next to 'Suggested clips' at the top-left corner.
Now, you're going to see all of the clips that you've selected here, and you can combine multiple clips together. This is the great thing; all you need to do to combine multiple clips is select 'Montage' on the sidebar on the left side of the screen. You can see here that you'll be able to piece together tons of clips.
Let's say that you have five or six different clips that you want to use, you'll select each of these in the top-right corner of the clip's box, and then simply select 'Create Montage' at the bottom of the page.
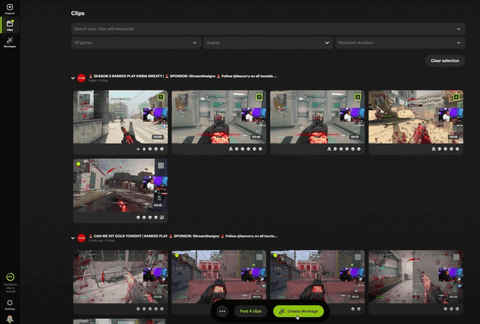
It's going to ask if you want to create a 'Vertical' or 'Horizontal' montage; we'll press 'Select Vertical Video'. This is going to go ahead and take all of the clips that you've just selected and merge them into one video with nice transitions between the clips that you can post on social media.
Now, I'm going to go ahead and close that out as this is creating the montage. Once you create it, you'll see this under the 'Montage' page and you'll be able to upload it directly to TikTok.
When you press the 'Post on TikTok' button from the montage page, it will pop up with a 'Post Preview' box.
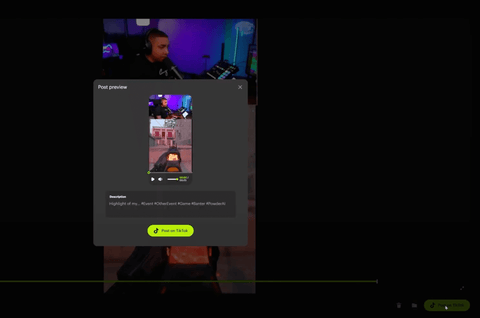
When you press 'Post on TikTok' from the post preview page, it will send the video to your TikTok inbox. Typically, this will take about 5-10 minutes.
Once you receive the video in your TikTok inbox, you'll be able to edit the video there as well and add your captions, hashtags, sounds, music, or anything else to the video before posting it. These things all help to bring the clips to life the way that you want.
The montage that I made combining five clips came out to be two minutes and 37 seconds, so definitely keep in mind the length of the clip when you're deciding which platform to post these to.
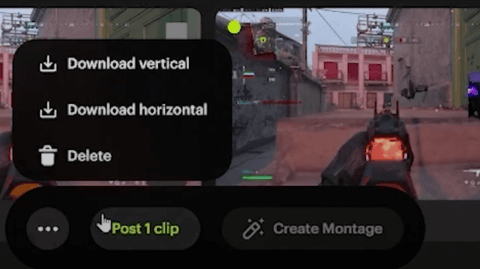
This is also a super easy way to make YouTube videos since there is the option to make a horizontal montage too. All you have to do is go to your 'Clips' page, select the clips that you want, and then go to the bottom of the page and press on the three little dots. This will then give you the option to download the clip vertically or horizontally so that you can use it for both YouTube and TikTok.
If you click on any of the videos, you'll be able to see what they look like on the right-hand side of the page and you can select 'Edit Layout' right above this preview if you decide that you want to make some adjustments.
If you picked the wrong game, for example, simply go into the full stream, click the game icon in the top-right corner and you can change which game it is.

This is also where you'll go if you need to change the language that the stream is in. Once you select 'Confirm', the stream will be reanalyzed and it will adjust the clips.
Again, this software has saved me hours and hours of time since I no longer have to manually sift through the entire stream to pick out and edit these clips. For the last ten days, I have streamed every day, and each of those streams is three or four hours long.
For me to have gone through all of that content alone is very challenging and time-consuming, but Powder has saved me so much time by doing it for me. Now, I'm able to post to my TikTok every single day which is a great way to grow my account.
I would highly encourage you to give this software a try so that you too can save lots of time and have very high-quality content coming out on a consistent basis.
Don't forget to go to Powder.gg and use the code LASCURRY50 for 50% off of the yearly plan! It's currently 65% off already and you can use this discount to get another 50% off of the discounted price. It's a no-brainer that this is a phenomenal price for a really great and powerful software.
If any of you reading this have any questions, feel free to reach out to me and ask on Twitch.
Next, if you want to learn how to grow your livestream, even if you only have 10 hours a week, check out this video here. In this, I will walk you step-by-step through how to grow a stream from zero in just one year.

![How to Add Overlays in OBS Studio (Complete Streaming Setup Guide) [2026]](http://www.streamdesignz.com/cdn/shop/articles/Thumbnail_1_917415b4-0055-48d9-9f13-46b188205824.png?v=1782571692&width=1920)

How to Setup Twitch Emotes
Should You Buy Shure MV7+ or MV7? (Don't Waste Money)